Using the Registration Menu in MyWilmU
- Log in to MyWilmU.
- Find Register for Classes.
- Select Register, Drop, Add, Withdraw to access the Registration menu.
The Registration Menu provides the following options.
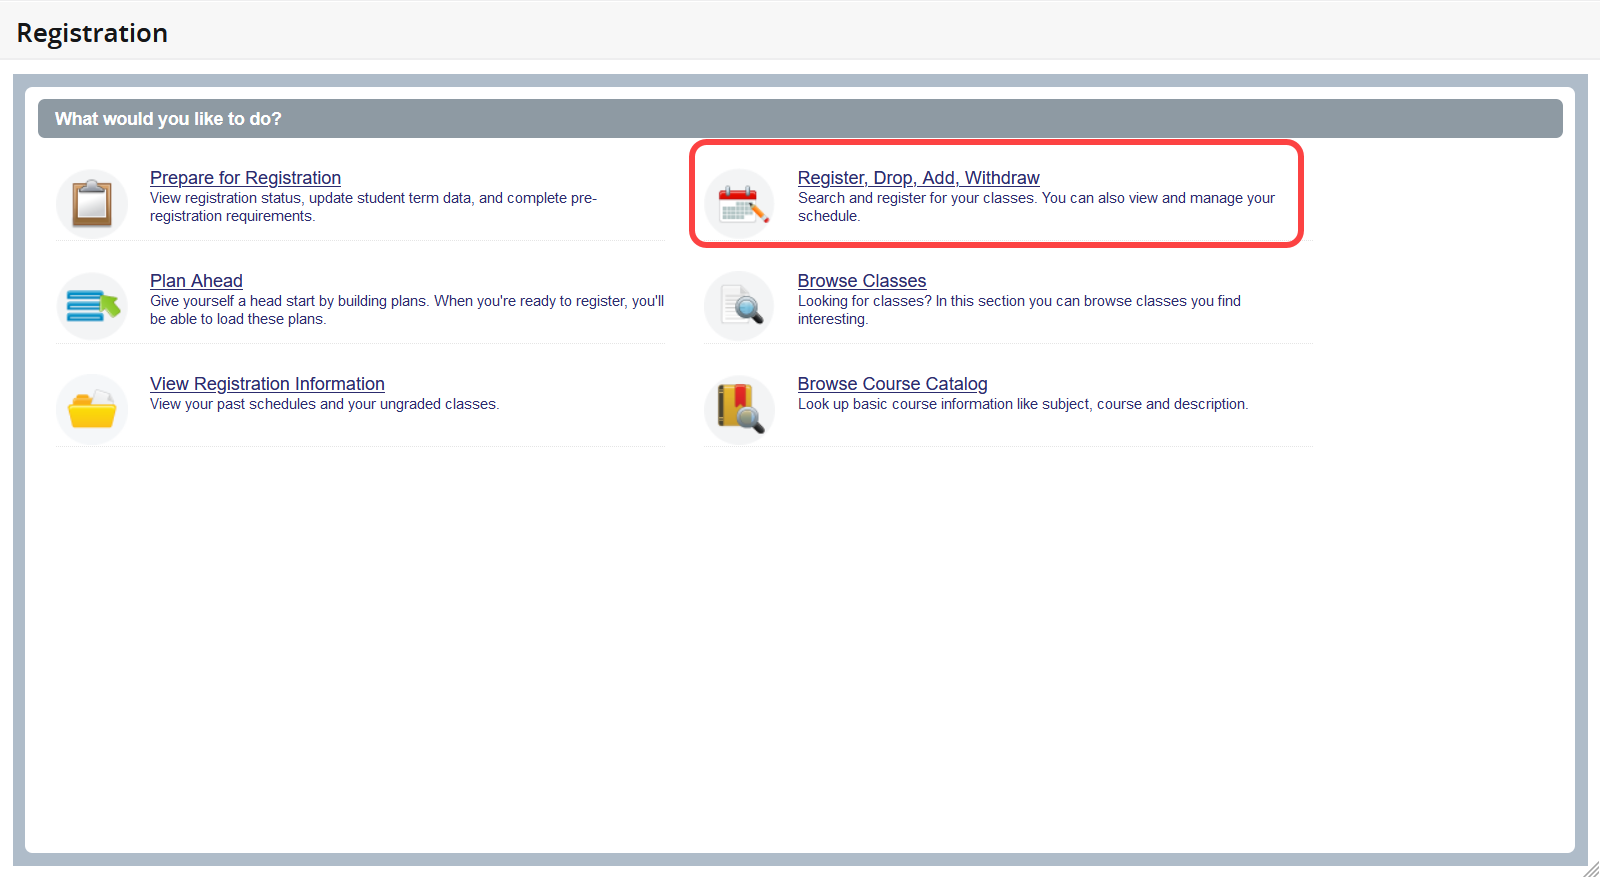
Prepare for Registration
This includes details of your holds, academic standing, student status, classification, earned credit hours, registration permits granted, and a summary of your declared curriculum (major & degree). This is a good place to check for barriers which may prevent you from registering in a current or upcoming term.
Plan Ahead
This is a tool for students and advisors to build a planned class schedule that can include courses and/or class sections, as well as notes about individual classes or about the overall plan. Registration plans are typically built by students and/or their advisors before registration opens for a new term.
View Registration Information
Students can use this link to view their class schedule in various formats. The default page displays the class schedule for a term in both simple list and calendar formats. The Schedule Details link (in the calendar format pane) displays more detailed information about each class, including start and end dates, meeting days/times, classroom, and instructor(s).
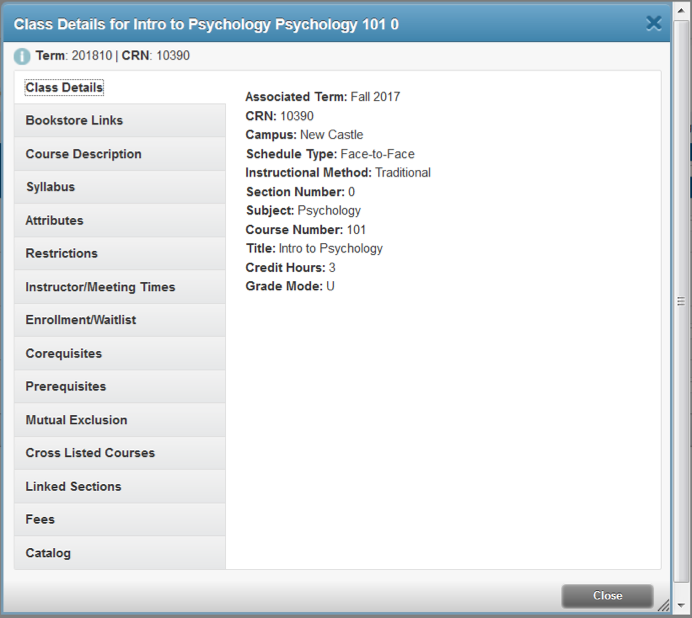
Click on a class title to access full class details, including the catalog course description, textbook information, enforced prerequisites and other registration restrictions, and special class fees.
Note that these views of a class schedule only reflect actively registered classes, and do not include withdrawn or waitlisted classes. Withdrawn classes (classes that have been dropped after the drop deadline with an automatic grade of W assigned) and waitlisted classes (those in which you are not yet registered, but are on the registration waitlist) can be seen in the Register for Classes area.
Register, Drop, Add, Withdraw
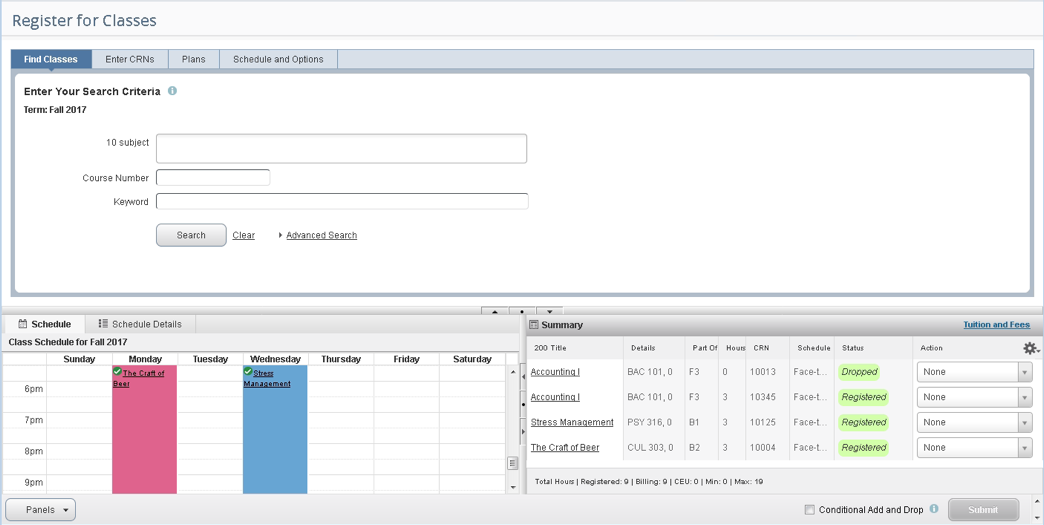
The default view in Register for Classes looks like the screenshot below. The top pane allows you to search for classes, and the bottom panes show the student’s class schedule summary – in a calendar format on the left and as a list on the right. As students add classes from the top pane, they are first added to the schedule Summary below in a “Pending” status (similar to a shopping cart). Students can see how the class would fit with their current class schedule before actually attempting to register in the class. Students can also drop and waitlist classes from here.
Browse Classes
This feature allows multiple ways to search for class sections offered in a given semester. After selecting a term, you can enter your search criteria in the fields provided, or click the Advanced Search link.

Here are some tips for entering search criteria in the Browse Classes tool:
- Entering a subject is NOT required.
- To see the available list of values for a search criterion, click in that field and the options will display below. Click on one or more options to include them in your search criteria. To narrow down the values that display, start typing the description, then select the desired option from the smaller list that appears. (Note that adding multiple options in a single search criterion will connect those options with an “or” when applying your search criteria.)
- The % wildcard character can be used in the Course Number and Title fields.
- To return open sections only, use the Advanced Search and click the Open Sections Only box (at the very bottom). Note that full/closed sections with waitlists will display in the results.
- Click the Clear link at the bottom to clear out all previous search criteria and start fresh with a new search.
Your search results will display in a list format similar to the image below:
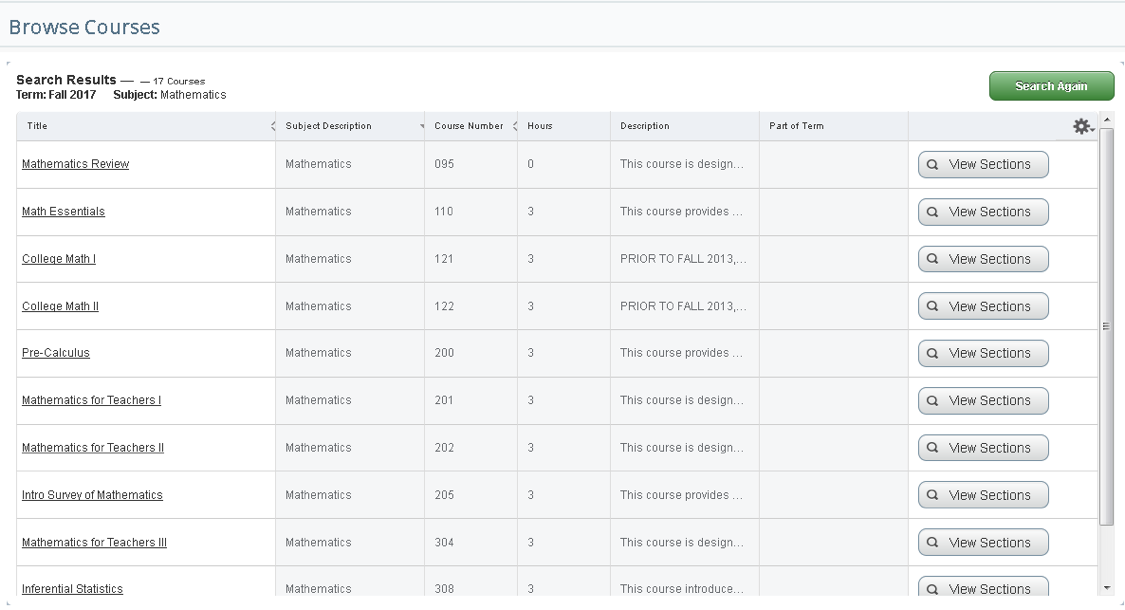
Screen shot of the Class Search results
Here are some tips for viewing class details in the search results:
- If you hover over something that isn’t fully displayed, a pop-up box will appear that shows all of the details
- Click on a class title to access full class details, including the catalog course description, textbook information, enforced prerequisites and other registration restrictions, and special class fees:
- Use the vertical scroll bar on the right (if needed) to view more sections on the page, the horizontal scroll bar on the bottom (if needed) to view more information about the classes, and use the page navigation tools in the lower left corner to access more search results and/or adjust the number of sections that display per page:

Search results page navigation controls - The lower right corner will display the number of class sections that matched your search criteria:

screen shot of number of records in results - To start a new search, click the green Search Again button in the upper right corner.
Browse Course Catalog
The Course Catalog contains the entire course inventory for the term, although not all courses in the catalog will offer sections for that term.
After selecting a term, you can enter your search criteria in the fields provided, or click the Advanced Search link.
Here are some tips for entering search criteria in the new Browse Course Catalog tool:
- Entering a subject is NOT required.
- To see the available list of values for a search criterion, click in that field and the options will display below. Click on one or more options to include them in your search criteria. To narrow down the values that display, start typing the description, then select the desired option from the smaller list that appears. (Note that adding multiple options in a single search criterion will connect those options with an “or” when applying your search criteria.)
- The % wildcard character can be used in the Course Number and Title fields.
- To return open sections only, use the Advanced Search and click the Open Sections Only box (at the very bottom). Note that full/closed sections with waitlists will display in the results.
- Click the Clear link at the bottom to clear out all previous search criteria and start fresh with a new search.
Your search results will display in a list format similar to the image below:
Here are some tips for viewing course details in the search results:
- If you hover over something that isn’t fully displayed, a pop-up box will appear that shows all of the details
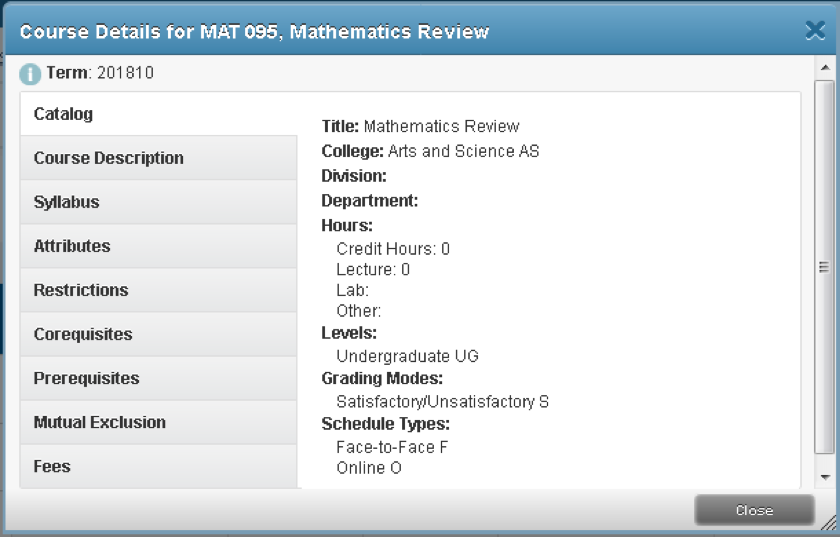
- Click on a course title to access full course catalog details, including the catalog course description, credit hours, level(s), schedule type, enforced prerequisites and other registration restrictions, and special course fees:
- Click on the View Sections button to view the list of class sections offered for that course in the term.
- To start a new search, click the green Search Again button in the upper right corner.