How to Setup Microsoft Authenticator App to Verify Your Login

Follow these instructions to setup your second login step as approving your login with the Microsoft Authenticator mobile app.

Step-by-Step Instructions

  1. Login to WilmU Account Setup.

    1. Enter your Wilmington University email address.
      • For students, the format is flastname001@my.wilmu.edu
      • For employees, the format is firstname.m.lastname@wilmu.edu
      login page - enter email addresss
    2. Click Next. This will bring you to Wilmington University’s log in page.
      login page - click next
    3. Enter your Wilmington University password and click Sign In.
      login page - enter password and sign in
  1. Click Security Info on the left-hand navigation pane.
    click security info from the left navigation
  2. Click Add method on the right.
    click add a method
  3. Select Authenticator App from the Choose a method drop-down menu.
    choose authenticator app from the drop-down menu
  4. Click Add. This will take you to the Start by getting the App page.
    click add
  5. Install the Microsoft Authenticator App on your mobile device (download from the App Store or Google Play).

    Apple Devices

    iPhone home screen app store
    iPhone app store Get Microsoft Authenticator

    Android Devices

    Android phone play store icon
    Play store install Microsoft Authenticator
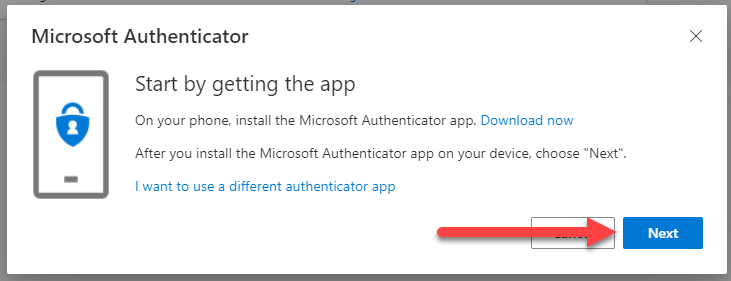
  6. After installing the Microsoft Authenticator app on your mobile, click Next on your computer, on the Start by getting the App page.
    start by getting the app page - click next
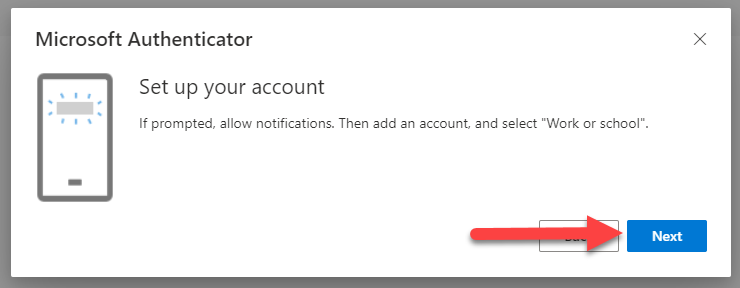
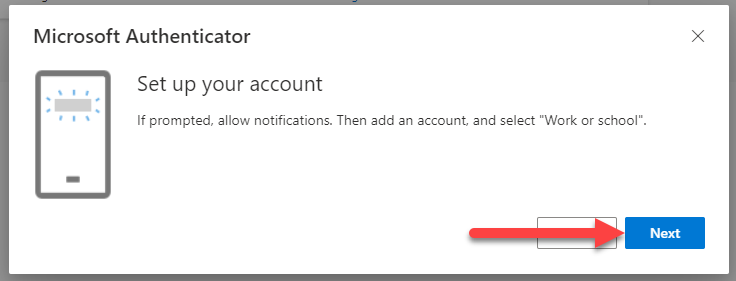
  7. Click Next on the Set up your account page. You will want to stay on this page while you configure the Microsoft Authenticator app on your mobile device.
    setup your account page - click next
  8. Open the Microsoft Authenticator app on your mobile device.
    microsoft authenticator mobile app icon
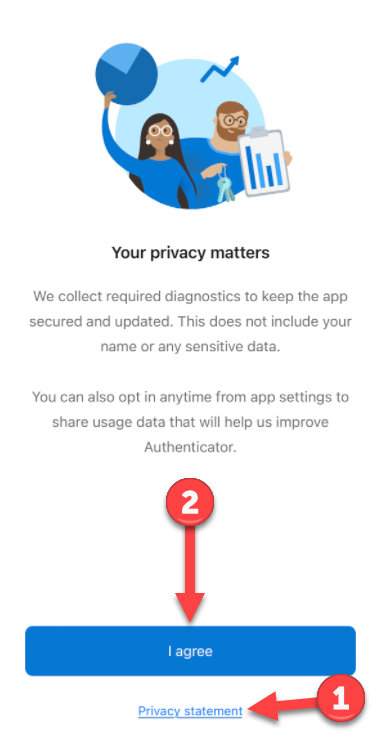
  9. Click I agree after reviewing the privacy statement.
    click I agree on the Authenticator app privacy statement
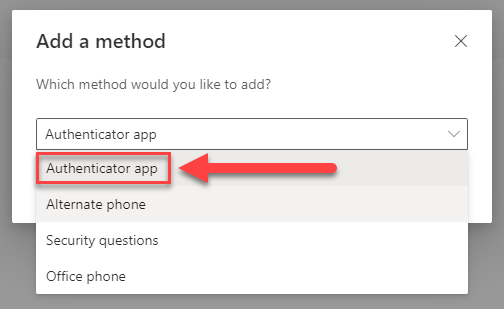
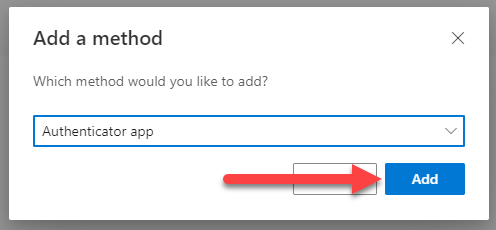
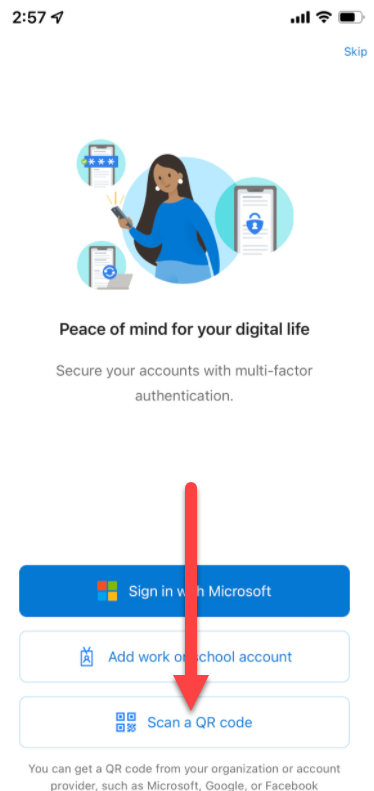
  10. Select Scan a QR code.
    Microsoft Authenticator click Scan a QR code

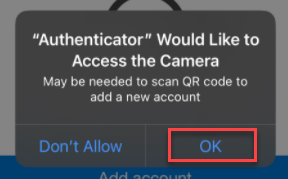
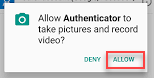
    Important: The first time you set up the Microsoft Authenticator app, you might receive a prompt asking whether to allow the app to access your camera (iOS) or to allow the app to take pictures and record video (Android). You must select Allow so the authenticator app can access your camera to take a picture of the QR code in the next step.

    apple allow camera access dialog
    Android allow Authenticator to take pictures and video dialog
  11. Return to your computer. On the Set up your account page. Click Next.
    Microsoft Authenticator -setup your account - click next
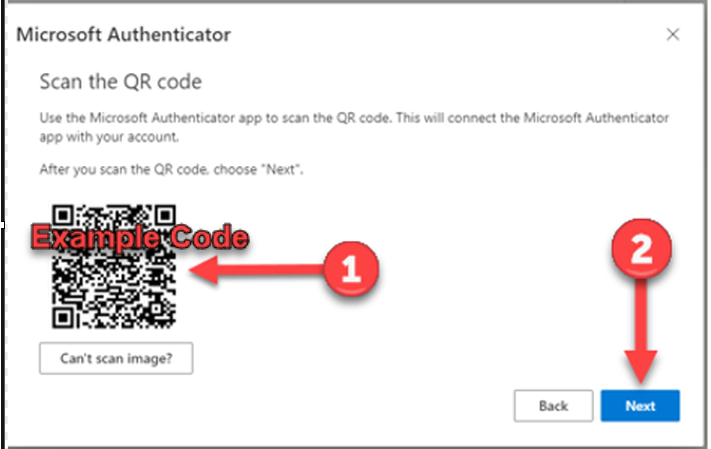
  12. This will take you to the Scan the QR code page. Scan the code with the Microsoft Authenticator app QR code reader. After doing so, click Next.
    scan on-screen QR code
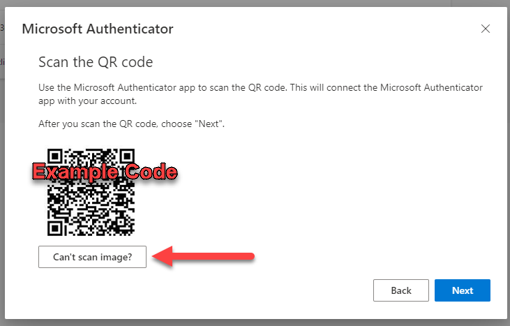
    If the QR code reader can’t read the code, click Can’t scan image? and manually enter the code and URL into the Microsoft Authenticator app on your mobile device.
    click can't scan image
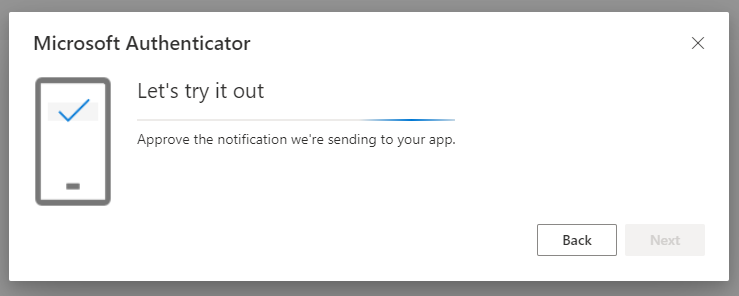
  13. You computer will then appear with Let’s try it out, while the app requests that you approve the sign-in on your mobile device.
    Let's try it out page
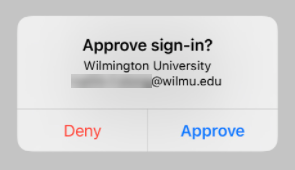
  14. A notification will be sent to the Microsoft authenticator app on your mobile device to test your account. Tap Approve or Accept on your mobile device.
    Approve sign-in dialog on mobile device
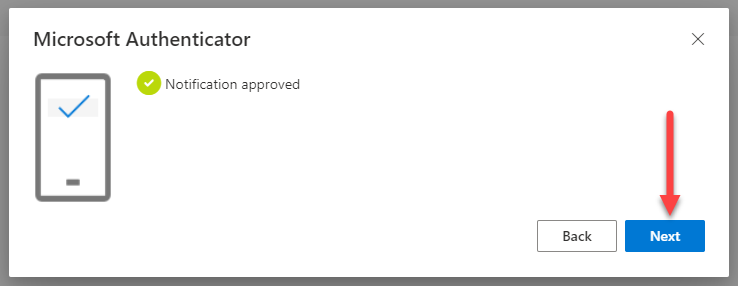
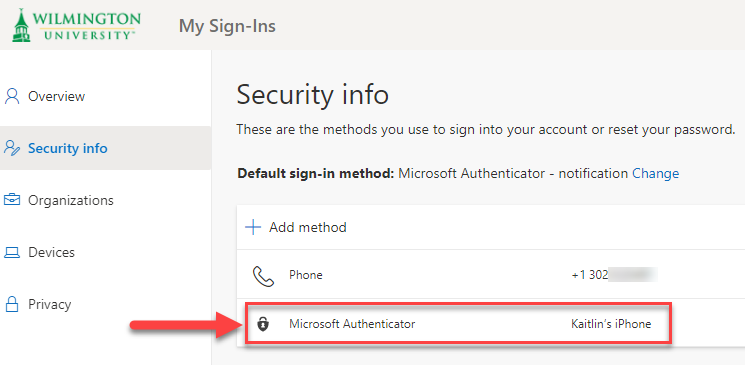
  15. Click Next on your computer, which will then take you back to the Security info page where the Microsoft Authenticator will now show as a sign.
    Microsoft Authenticator notification approved confirmation - click next
    Security info page - Microsoft Authenticator added
  16. The authenticator app will add your work or school account without any further information from you.
    Microsoft Authenticator showing WilmU account
    Microsoft Authenticator app WilmU account options screen